Welcome to my blog phone parts › 2020年07月
2020年07月31日
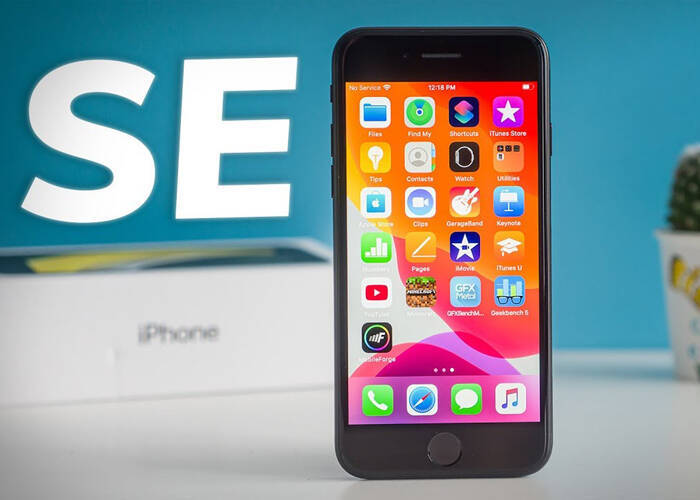
iPhone SE 2020 VS iPhone 8 – Which parts Could be Swapped?
The iPhone SE 2nd has been released and it looks similar to iPhone 8. Despite the iPhone SE 2020 special functions, such as 3D touch and true tone, it is still possible that some of the iPhone 8 parts could be swapped on iPhone SE 2nd. Here we make a test on some of the swappable parts between these two models. Let’s see what they are.
1. Swappable parts:
Display Screen
Cameras
Ear speakers
Taptic engine
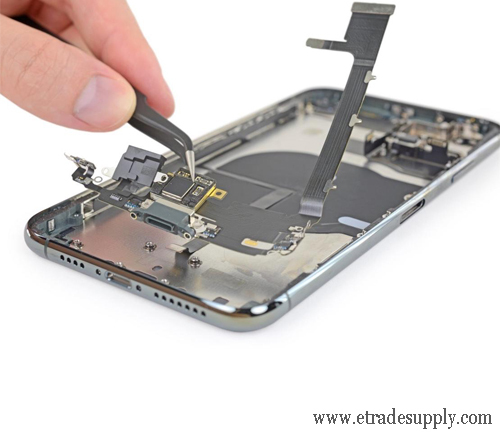
Charging port
SIM card tray
Notice: The iPhone SE display screen and iPhone 8 screen are swappable, but the iPhone SE 3D touch function and true tone cannot display on iPhone 8. We need to copy the iPhone SE display data via an IP Eeprom programmer and rewrite the data to the iPhone 8 display screen so that we can have true tone if we replace the iPhone SE display screen with iPhone 8 display. Details refer to our blog: How to Get True Tone Function Back on Aftermarket iPhone X OLED Screen?
The iPhone SE cameras can be replaced with iPhone 8’s, conversely, iPhone 8 cannot replace with iPhone SE’s cameras.
2. Not swappable parts:
Battery
Back battery panel
Home button
Reasons: The iPhone SE battery and iPhone 8 battery cannot be interchanged because the connector size is different. The iPhone SE battery flex cable is larger than the iPhone 8’s. The back battery door cannot be replaced because logo color and position are different, which makes the protective cover be different in these two iPhone models. The iPhone SE 2020 and iPhone 8 home button cannot be interchanged because the iPhone SE Touch ID security requirement tends to be higher than iPhone 8’s.
The description above is mainly about the interchangeable parts between iPhone SE 2020 and iPhone 8. It would be helpful if we learned these swappable parts. Also, the iPhone 8 parts replaced on iPhone SE is cost-saving in some way. In the end, Etrade Supply has the best quality iPhone SE 2020 replacement parts and iPhone 8 parts here. Just contact us if you are interested.

1. Swappable parts:
Display Screen
Cameras
Ear speakers
Taptic engine
Charging port
SIM card tray
Notice: The iPhone SE display screen and iPhone 8 screen are swappable, but the iPhone SE 3D touch function and true tone cannot display on iPhone 8. We need to copy the iPhone SE display data via an IP Eeprom programmer and rewrite the data to the iPhone 8 display screen so that we can have true tone if we replace the iPhone SE display screen with iPhone 8 display. Details refer to our blog: How to Get True Tone Function Back on Aftermarket iPhone X OLED Screen?
The iPhone SE cameras can be replaced with iPhone 8’s, conversely, iPhone 8 cannot replace with iPhone SE’s cameras.
2. Not swappable parts:
Battery
Back battery panel
Home button
Reasons: The iPhone SE battery and iPhone 8 battery cannot be interchanged because the connector size is different. The iPhone SE battery flex cable is larger than the iPhone 8’s. The back battery door cannot be replaced because logo color and position are different, which makes the protective cover be different in these two iPhone models. The iPhone SE 2020 and iPhone 8 home button cannot be interchanged because the iPhone SE Touch ID security requirement tends to be higher than iPhone 8’s.
The description above is mainly about the interchangeable parts between iPhone SE 2020 and iPhone 8. It would be helpful if we learned these swappable parts. Also, the iPhone 8 parts replaced on iPhone SE is cost-saving in some way. In the end, Etrade Supply has the best quality iPhone SE 2020 replacement parts and iPhone 8 parts here. Just contact us if you are interested.

2020年07月25日
How to Upgrade the iPhone X Memory
The iPhone memory could be upgraded to larger storage by tearing the logic board, separating the NAND flash, and restore the data. We tried this before on the iPhone 6s and made the storage upgraded successfully. This time we do it on an iPhone X and see if it works. The iPhone X storage will be upgraded from 64G to 256G if the procedure is successful. Here are the steps we are taking in the process below. Check it out:
1. Tear down the phone and take out the logic board
Firstly, we need to tear down the iPhone display screen. Loosen the screws and remove the metal plate, then disconnect the battery cable and all the display screen connectors. Take out the SIM card tray. Carefully pry out the logic board from the phone, and fixing it on the PCB board holder. The NAND flash chipset is in the center of the logic board, which contains the memory data of the phone. We need to separate it so that we can restore the 256G data in it. Let’s move to the next step.
2. Separate the NAND flash chipset, copy and restore the data
Use hot air gun to blow on the NAND flash chipset in 330℃ until it is loose. Gently pry to separate it with an ultra-thin steel pry tool. Flip it over aside after it is separate from the board pad. Clean out the adhesive glue from the logic pad with tweezers with 365℃ hot air gun blowing at the same time. Place a new 256G flash into the NAND flash recovery data programmer and store the storage data. Take it out after it is finished and place the 56G NAND flash into the programmer. Restore the data to the flash from the programmer. Now the NAND flash storage data has been rewritten. We need to reball it and install it back to the logic board.
3. Reballing the NAND flash and install it to the logic board
Place the NAND flash on the repair table. Cover the GBA reballing stencil on it, make sure it is in the right position on it. Smear the solder on the stencil and heat the solder with 330℃ hot air gun blowing until it shapes completely. Remove the stencil after the solder coagulated. Hot air gun blow on it for a while to make it shapes completely. Leave the NAND flash to cold down and then install it back to the logic board. Before that, we need to paste some BGA fluid on the logic board pad. Hot air gun blows on it and adjust the position with tweezers.
4. Install the logic board back to the iPhone and connect the display screen back
After the NAND flash is cold and coagulated, we need to install the logic board back to the iPhone. Tighten the screws for fixing the logic board. Connect the display screen back and insert the SIM card tray back. Plug the battery connector and fixing the cables with metal plate and screws. Turn on the iPhone and connect it to computer via iTunes.
5. Store the iPhone in DFU mode and assemble the iPhone
In the end, we need to store the iPhone in DFU mode so that the storage data could be restored. When the process is finished, the iPhone will restart automatically. At this time we can check the storage on Settings. Here we can see the memory has been upgraded into 256G. Turn off the phone and assemble the iPhone X display screen and digitizer back. All the procedure is finished.
Finally, we need to know that the manipulation above is under the hands of the professional repair person’s, and with the technological devices. The iPhone logic board life will be shortened after the storage upgrade procedure. We suggest you consider it times if you want to do it to your iPhone X. Anyway, Etrade Supply has the best iPhone X replacement parts here. Please go to our online store or contact us if you need any parts for iPhone repair.

2020年07月17日
How to Fix iPhone 11 Pro Volume Button Not Working Problem
Sometimes the iPhone 11 Pro volume buttons are not working after crashed on the floor. Despite resetting the systematic data of Settings, the problem is still not fixed. Based on the situation we assume the problem may be the disconnection of volume button flex cables or damages of volume buttons. Here we will try to tear down the phone and try to replace the volume button flex cables. Let’s check this out:
1. Tear down the iPhone 11 Pro and check the disconnection of the flex
Firstly we need to get all the tools ready. The iPhone 11 Pro teardown process refers to the blog article of How to Replace iPhone 11 Pro Rear-facing Camera? When the display screen is separated, check the connection of the volume button flex cables. Pry up the cables and plug again to make sure it is tightly connected. Turn on the phone and check the volume buttons to see if it is OK. The volume up and down buttons are still not working. Take a new wireless coil with volume button flex cables for testing. Disconnect the volume button flex cable again. Connect the new wireless coil flex cable to the phone. Turn on the phone and test the volume button function. The new volume button flex control is normal. Now we are sure the problem is the damage of the volume button flex. We need to replace the volume buttons.
2. Tear off the interior parts and replace the volume button flex cable
Since the volume button flex cables are combined with the wireless Turn off the phone and disconnect the battery cable. Disconnect the flex cables and remove the display screen. Loosen the screws and take off the interior parts, which include the mainboard, the rear-facing camera, the front-facing camera, and the battery. After that, we need to pry and remove the wireless charging coil and the volume flex cable. Loosen the volume button screws. Use hot air gun to blow and carefully pry out, tear it to remove the charging coil from the back panel with a steel pry tool. Clean out the black adhesive glue on the panel.
3. Install the new iPhone 11 Pro wireless charging coil with volume button flex and assemble the iPhone
Place the new wireless charging coil on to the phone, make sure it is in the right position as the original one. Gently press it to make sure it is tightly stick on the back panel. Tear off the adhesive tape from the coil. Tighten the volume button flex with the screws for fixing it. Install the battery back, but don’t forget to past the battery adhesive tape on it beforehand. Install the cameras back and so as the mainboard, tighten the screws back for fixing the mainboard. Connect the display screen back and the battery cable on the last. Place the metal plate and fixing it with the screws. Assemble the display screen, make sure it is no gap on the edge and each corner. The whole repair process is done.
We have to say, the iPhone 11 Pro’s interior structure is complicated. We still have to tear down the phone and check the volume buttons flex so that we can find the reason for the problems. Anyway, you may also go to Etrade Supply online store for any iPhone 11 Pro replacement parts if you are working in the repair shop. Anything about iPhone 11 Pro replacement parts, please leave your message or contact us on email. Etrade Supply is glad here for help.

2020年07月11日
5 iPhone Repair Tips You Should Know
Our iPhone is a complex mobile device. It is so important that we need to be careful and patient on iPhone repair. Here we would like to come up with the five mistakes we would frequently make during the procedure of iPhone repair. We hope these tips will help you become more professional in iPhone repair.
1. Organize the screws well, don’t miss any screw or part
An iPhone contains too many tiny screws inside. Screw types such as pentalobe screws, Phillips screws, and Y-type screws. We need to organize all the screws we loosen off from the phone. Using a repair desk mat will be good for screws and parts organization. You may also use small boxes for holding screws if you don’t have a repair desk mat.
2. Choose a good and complete repair tool kit
The repair tools are necessary for mobile phone repair. Choose a good and complete repair tool kit that will make your repair works faster and more efficient. The whole iPhone repair tools kit should be contained types and sizes of screwdrivers, the opening tool like suction cup, spudger, plastic plectrum, steel prying tool, etc. Each tool functions differently, we should use them well. Do not use any other tool to tear down your phone instead, because it will damage it and the interior parts.
3. Don’t choose the cheap parts for replacement
The second thing you need to care about is don’t use the cheap, low-quality parts for your iPhone replacement. There are so many cheap parts for sale on the net. We suggest you to choose the high-quality, well-known brand replacement to purchase, even though it is expensive. Cheap parts are always bad in quality and also short warranty with follow up after-sale issues. If you don’t want to tear down your iPhone over and over again, just don’t choose the cheap parts for replacement.
4. Be careful on battery adhesive tape removal
The next thing is the iPhone battery adhesive tape removal. The battery adhesive tape is tightly past underneath the battery. It is no easy to pull out for removal. We should be very careful about it because when it is broken during pulling, it will take you lots of time to heat the adhesive tape and pry out the battery. The best way for battery adhesive tape removal is to use tweezers to pull out the side slowly, roll up and pull out the tape.
5. Don’t forget to disconnect the battery cable firstly and connect it back at last
The battery flex cable should be disconnected firstly after the display screen is tear down because it will cause the electric short circuit to the mainboard when we touch the parts with our fingers. We should always remember this when we tear down the phone. Don’t forget to connect the battery cable at the last after connecting all the display screen flex.
These five aspects are really important in iPhone repair. We should keep these in mind no which iPhone model we are teardown and repair. Besides, we can also focus on some iPhone replacement parts. Etrade Supply new stock-in iPhone X display screen and digitizer and other replacement parts for other iPhone models. Please go to our online store and contact us if you are interested in our iPhone parts.

2020年07月03日
5 Amazing Settings You May Not Know about iPhone SE 2020
The iPhone SE 2020 has been launched in March this year. This is the newest iPhone model presently and it brings us some amazing functional features. We all know the latest iOS version has made our iPhones more and more powerful. Here we would like to tell you 5 useful settings of iPhone SE 2020, and we are sure you will be glad to learn these settings and make your iPhone SE great to you.
1. Add two or more fingerprint touch IDs
We know that the former iPhone generations only allow us with one fingerprint touch ID for screen unlocked. This time iPhone SE gets us two or more touch IDs on settings, which means, we can unlock one device with two or more fingerprints by setting. Just go to settings and enter passcodes to access to Touch ID & Passcode, you can add two or more fingerprints touch IDs on your iPhone SE.
2. Hide notification message when the phone is locked
We all know that Apple is making the best efforts to protect our users’ privacy. This has been clear in this setting for iPhone SE. We can hide the pop-up notification messages from our iPhone locked screen. Same as the previous setting, we go to Settings and enter passcodes to access to Touch ID & Passcode. Here we can see all the applications on the list, select the items to switch it off if you don’t want to see the notifications on the screen.
3. Hide and disable apps from others
Just like we say, Apple has made the best for the security of users’ privacy. This setting enables us to hide our private apps from the screen or disable the deleted item from the apps. With this special setting, we can download any application we like to our iPhone SE with no worries about being watched or deleted by our close friends or family. Go to Settings >> Screen Time >> Tap continue and “This is My iPhone” >> Content & Privacy Restriction. Turn off the apps you would like to disable on settings.
4. Low battery mode for battery extension
The low battery mode of iPhone SE enables us to extend our iPhone SE battery life in some way. Go to Settings >> Control Center >> Customize Control. Here we can enable the low battery mode on our iPhone SE.
5. Raise to wake up setting
The Raise to Wake Up setting is one of the special features on iPhone SE. When we enable this function, our iPhone SE would turn off the screen automatically when we lay it down on the table. It will turn on the screen automatically when we pick it up. It’s very interesting. You can also turn off this function. It’s up to you.
So these are the 5 settings we would like to share with you. We hope you could try these settings and make your iPhone SE more convenient for use. Besides, you could also learn something about iPhone maintenance and repair. Etrade Supply offers iPhone SE replacement parts for wholesale. Just come to our shop if you have interests.